Proper Surface Preparation for Painting
Adequate surface preparation is very important for a smooth paint job. Start by freeing the wall of electrical fixtures, mirrors, wall clocks, or any window fixtures. You will also need to smooth out any hairline cracks or nail holes, and flatten all indentations and bumps.
Initial preparations step-by-step
You will need to ensure the surface is free of dust, dents, chalk flakes, or peels from the previous paint job. Unless the surface is flawless, the imperfections will always show up in the end.
- Begin by sanding the wall.
- You will also need to clean all walls with a detergent solution to remove the dust and any markings. You can also use a vacuum cleaner to ensure the walls are particle free.
- Wash the wall with tap water after using the detergent solution to make sure that no residue is left behind.
**Kitchen walls collect a lot of grease. You will need to use a higher concentration of detergent to remove such stains. A harsh solution may be necessary to clean algae and mold.
**Bathroom walls may also need a more potent cleaner due to the build up of soap scum. The dampness of bathrooms may also require additional drying time.
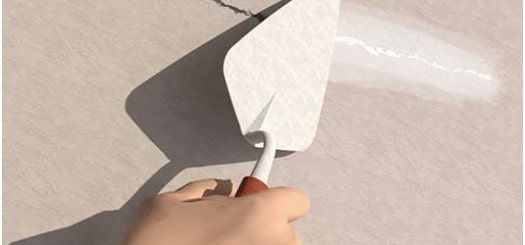
- Next, use a lightweight spackling product to cover any imperfections. Small cracks and holes are easy to cover. If there is a gaping hole, you will need to fill it with a small piece of wood before coving with the spackling compound.
**Sand lightly after you apply the coat. Spackling has a tendency to shrink upon drying, so a second application may be needed.
- Use a putty knife or a paint scraper to detach all peeling layers of previous paint coats, and sand paper for the finishing. Take extra precautions when you are peeling a lead-based paint and arrange for proper disposal.
The primer and the final paint
The primer puts a final smooth seal over any imperfections. For drywalls, use a water-based product. Oil-based primers are best for the walls treated for grease or paint peelings. You may need to apply one or two coats depending on the roughness of your wall. Allow this layer to dry properly before you put on the final paint. Otherwise, lime patches will emerge over the final coat.
Remember to remove all furniture at the beginning of the project, or move them to a center of the room away from the walls. Cover any nearby furnishings with a plastic wrap to protect from paint splashes.
If you need help painting the interior or exterior of your home, give us a call at 856-589-5895.